

Internet is a never-ending ocean of data that us, users put in knowingly or otherwise. Almost all companies in today’s world (Yes, this list includes the big ones too) use customer data to do targeted ads, product suggestions. These ads show up whenever you browse the internet and hog-up the bandwidth to load the ad content. This can be very annoying for users.
That’s where Pi-hole comes in play.
So, WTH is a Pi-hole?
Pi-hole is a network-wide ad blocker which acts as a DNS sinkhole to block ads and tracking entities out on the internet. This increases both security and privacy of the overall network.
You can find various Pi-hole related documentation here – https://docs.pi-hole.net/
I will deploy the Pi-hole container through Portainer.
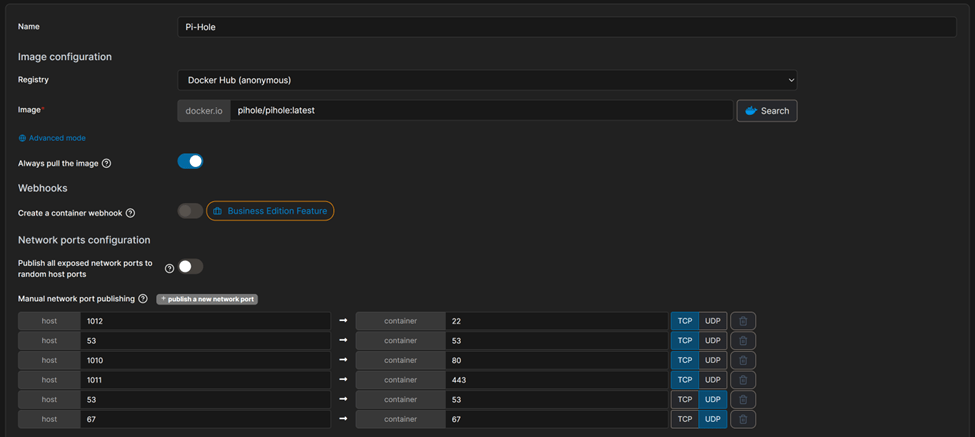
As you can see, I am using the latest Pi-hole image from docker hub.
Pi-hole needs a few mandatory container ports published –
- TCP/80 – HTTP
- TCP/53 – DNS
- UDP/53 – DNS
As you can see, I have added a few more for some future projects such as –
- UDP/67 – DHCP Server
- TCP/22 – SSH
- TCP/443 – HTTPS
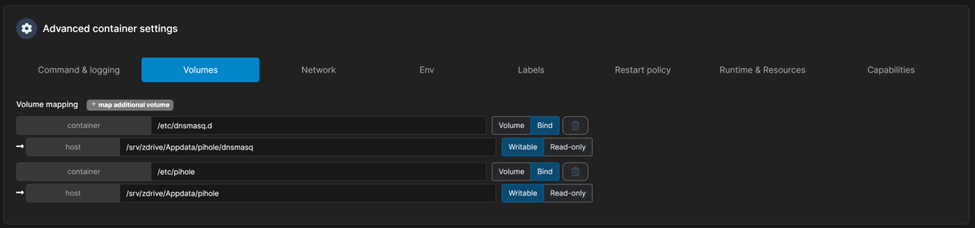
Once ports are published, let’s map the volumes. We will bind the actual host paths to the container paths.
Next for the ENV variables, I will add/change two variables –
- TZ – My local Timezone
- WEBPASSWORD – The password for the admin console

The last setting is ‘Restart Policy’ and I always select ‘unless stopped’

Now, we are ready to deploy this container.
We’re now ready to log into the GUI for the first time! Open up a browser and input the IP address followed by /admin in this format:
Http://192.168.20.120:1010/admin
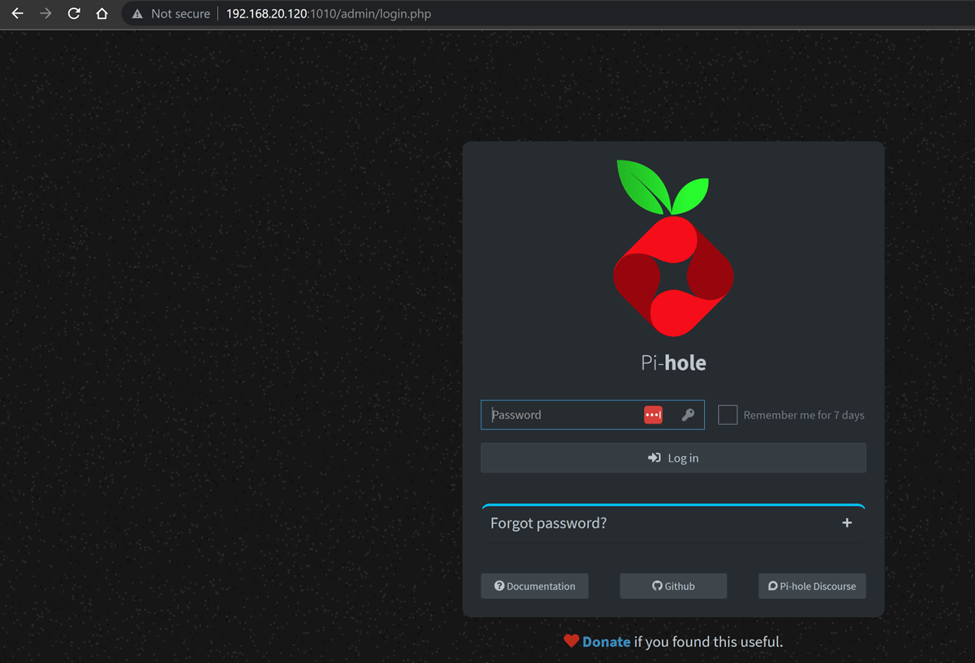
Let’s enter the admin password that we have set in the ENV variable step and click ‘Log in.’
Upon logging in, we’re presented with the Pi-hole Dashboard.
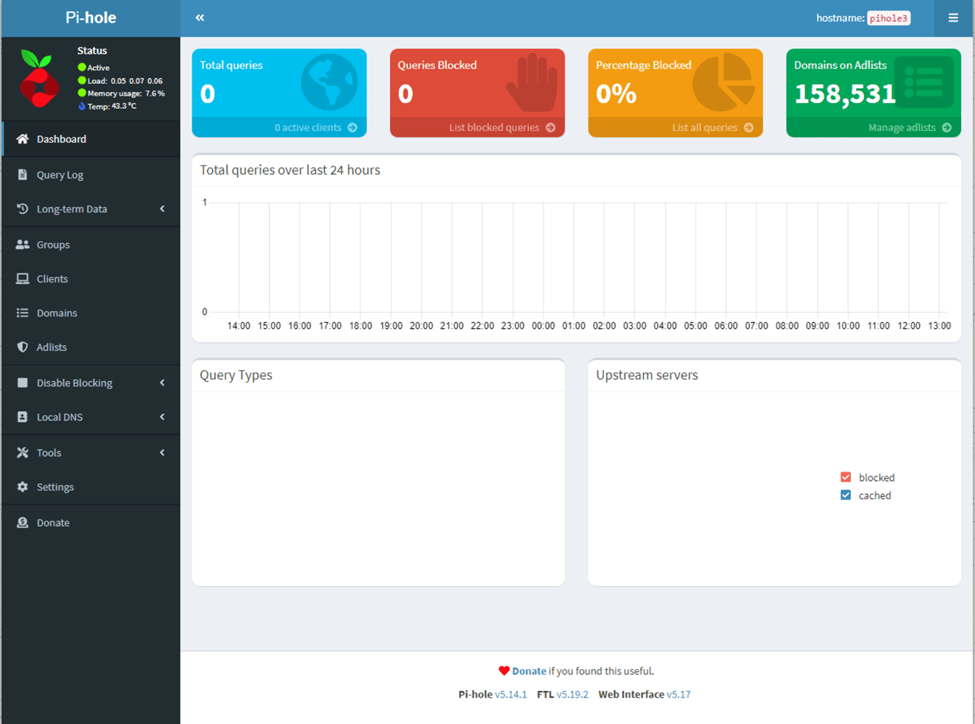
The Pi-hole is not setup yet. That’s why we are not seeing any valuable stats.
Down the left-hand side of the dashboard are our menu options. The 4 colored blocks across the top are some statistics. The blue box is the total number of queries Pi-hole has processed. The red box is how many of those queries matched FQDN’s on the block list and were blocked. The yellow box is a percentage of blocked requests (red box divided into the blue box). Finally, the green box is the number of domains that are on the block lists.
There are quite a few repos which maintains a pretty good list of adlists which can be used but I have found that following link covers the most and is regularly updated –
For starters, I will add 3 top lists from each category
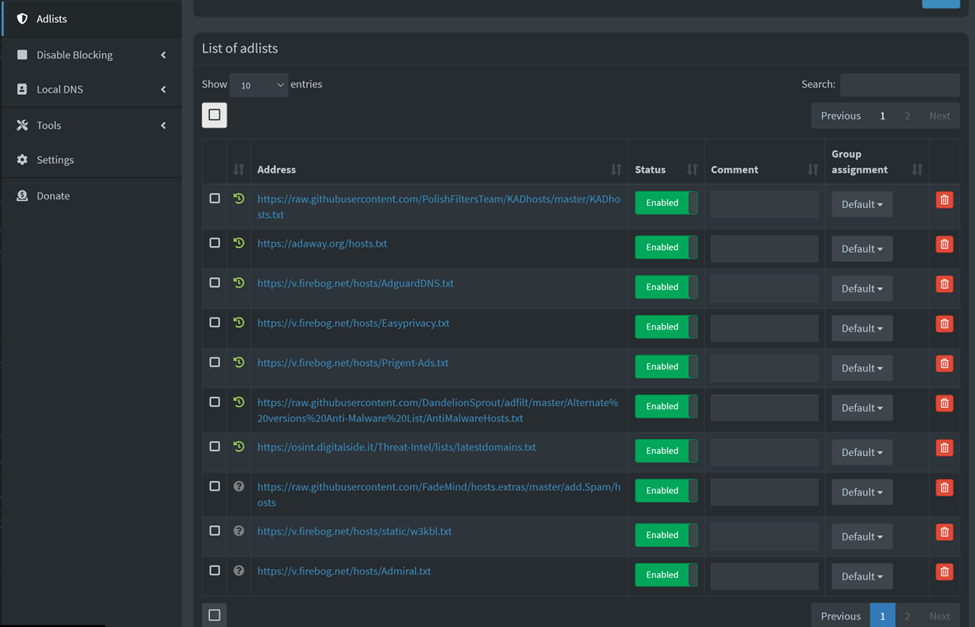
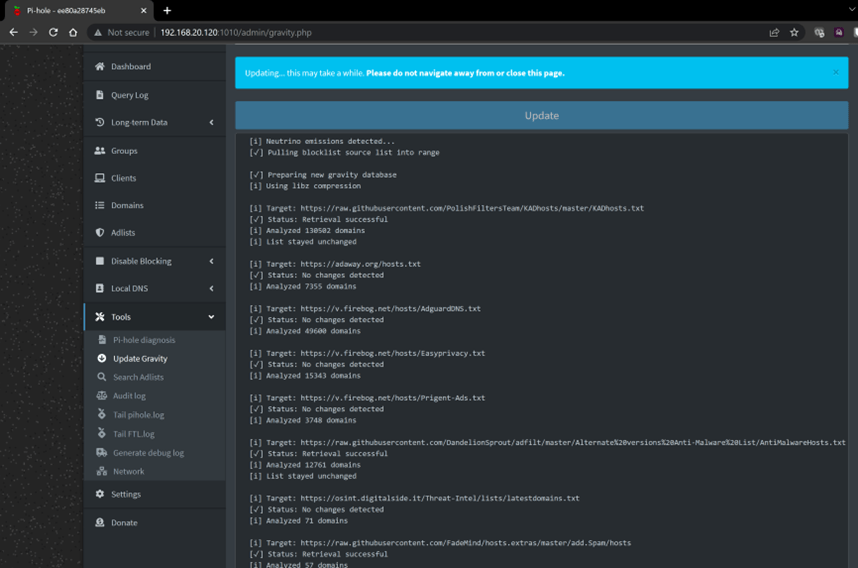
Once all the links are added, click on ‘Tools’ on the left panel and click on ‘Update Gravity’ and then click the blue ‘Update’ button on the top of the page to pull all the latest lists.
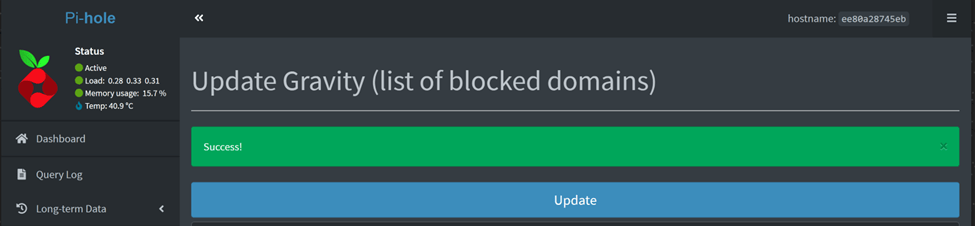
Once completed, you will see a green ‘SUCCESS’ banner on the top.
Let’s go back to the dashboard and see if we can see any change from before or not.

We can now see the number of domains on Adlists significantly increase. This is good.
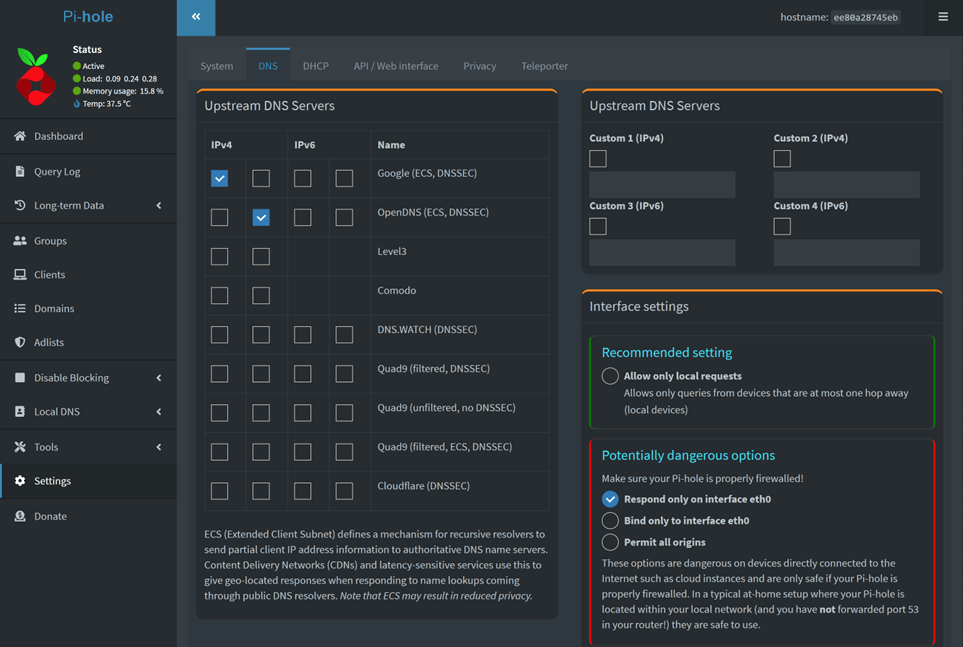
Now, let’s set the upstream DNS servers that the Pi-Hole will use to lookups and resolving FQDNs
The Pi-hole setup offers 8 options for an upstream DNS provider during the initial setup –
- OpenDNS
- Level3
- Comodo
- DNS.WATCH
- Quad9
- CloudFlare DNS
- Custom
Some providers offers filters for free such as phishing, pornography, spyware, etc. So, choose the ones of your liking.
I will go with Google as my primary and OpenDNS as my secondary upstream DNS servers.
Now, let’s get into our router and force DNS requests to flow through our Pi-Hole. My Raspberry Pi is connected to my home Wi-Fi network and has an IP Address of 192.168.20.120.

Make sure you reserve your Pi’s IP address if you are using DHCP. I reserved this IP Address already.
Let’s add the IP to the DNS Server field for the network where the Pi resides.

And that should it. Let’s go back to the dashboard to see if we can see clients DNS traffic hitting the Pi-hole or not.
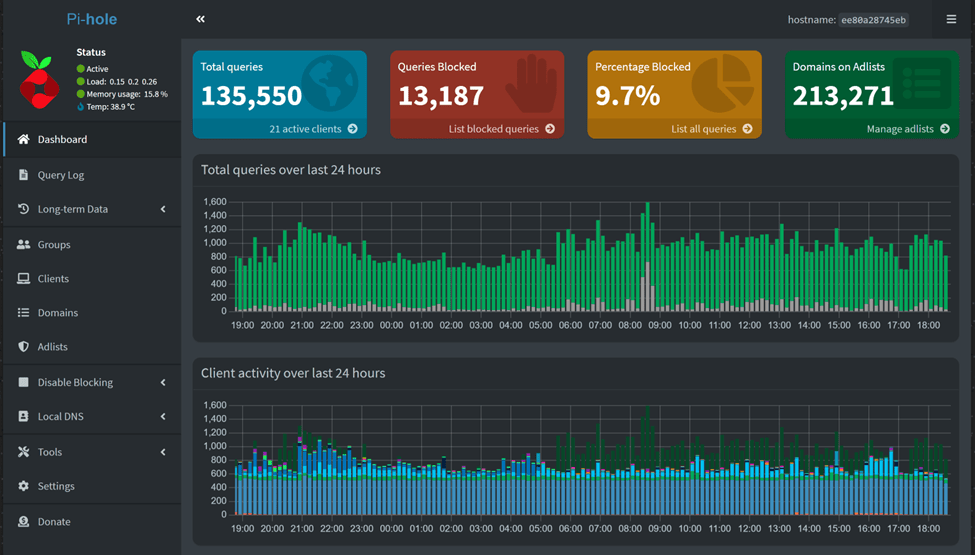
There you go. The Pi-hole is up and humming.
Note – This snippet was taken after a few weeks of installation, which is why, we are able to see so much of data. Your view might not be this enriched with data if you have just installed your Pi-hole and activated the DNS Sinkhole feature.
Let’s see how many queries are getting blocked.
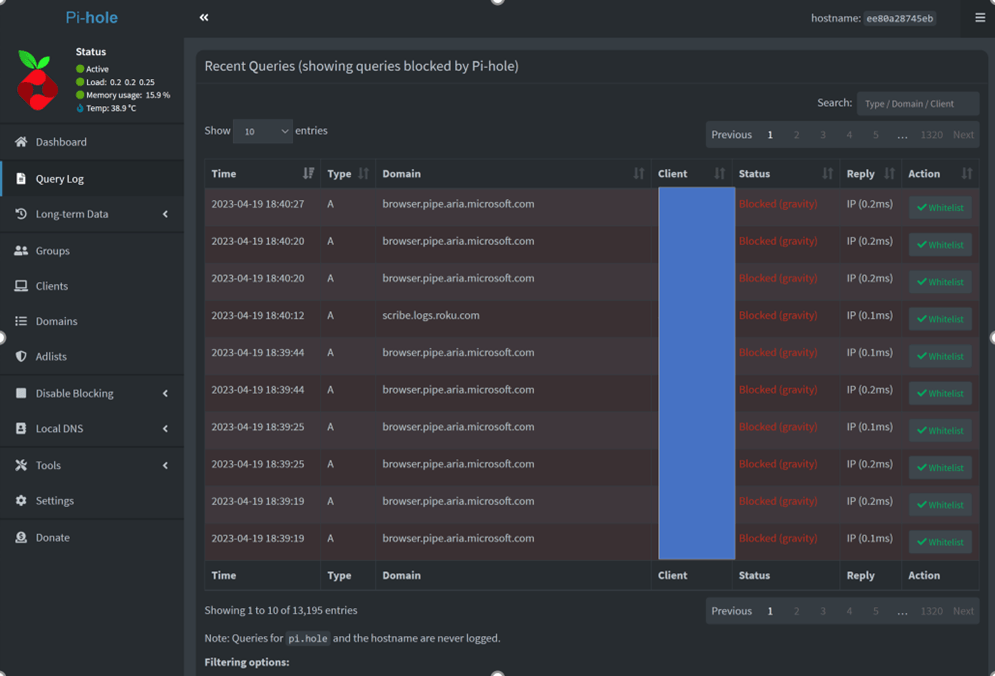
Look at all the URLs that are getting blocked. Love it!
Disclaimer – If you are planning on deploying this on your home network and your wife says that she is not able to open websites anymore, you might have to whitelist the URLs to save your marriage. 😊

Leave a comment